Getting Started
This guide provides step-by-step instructions for setting up CLArena, running your first continual learning experiment, and checking the results.
CLArena supports four machine learning paradigms:
- Continual Learning (CL): Learning new tasks sequentially while retaining previous knowledge
- Continual Unlearning (CUL): Selectively forgetting information in continual learning scenarios
- Multi-Task Learning (MTL): Learning multiple tasks simultaneously
- Single-Task Learning (STL): Traditional supervised learning for individual tasks
This quickstart focuses on the continual learning main experiment. For detailed documentation on other paradigms, see:
- Continual Learning (CL)
- Continual Unlearning (CUL)
- Multi-Task Learning (MTL)
- Single-Task Learning (STL)
1 Installation
Follow these steps to install CLArena in your Python environment:
# Create a new conda environment (optional but recommended)
conda create -n clarena-env python=3.12
conda activate clarena-env- Option 1, install from PyPI (recommended):
pip install clarena- Option 2, install from source:
# Clone the repository
git clone https://github.com/pengxiang-wang/continual-learning-arena
cd continual-learning-arena

pip install .CLArena installs the CPU version of PyTorch by default. For GPU acceleration, install the appropriate PyTorch version for your CUDA setup by following the official PyTorch installation guide.
2 Run Default Experiment
This section walks you through running a default continual learning main experiment to verify your installation and familiarize yourself with CLArena’s workflow.
CLArena uses configuration files to define experiment parameters. Download the example configurations:
- Extract the downloaded zip file to your working directory
- Rename the extracted folder to
configs/
Run the following command to start training with the default configuration:
clarena train clmain experiment=example_clmain_trainThis command will train a continual learning model using the default settings described below.
Default Experiment Settings (Click to expand)
The default experiment uses the following configuration:
| Component | Setting | Description |
|---|---|---|
| CL Paradigm | Task-Incremental Learning (TIL) | Global seed: 1 |
| CL Dataset | Permuted MNIST | Classification task with 10 tasks |
| Backbone Network | Multi-Layer Perceptron (MLP) | Hidden layers: 256, 100, 64 with batch normalization |
| CL Algorithm | Finetuning | Initializes from the last trained task |
| Training | SGD Optimizer | Learning rate: 0.001, 2 epochs per task, batch size: 64, CPU training |
Customizing Experiments
To run experiments with different configurations, refer to the Configure CL Main Experiment documentation.
3 Check the Results
After executing the training command, CLArena automatically creates an output directory containing all experiment data and results.
Results are saved in outputs/example_clmain_train/[timestamp]/, where [timestamp] represents the execution time. This structure allows multiple experimental runs to be stored separately.
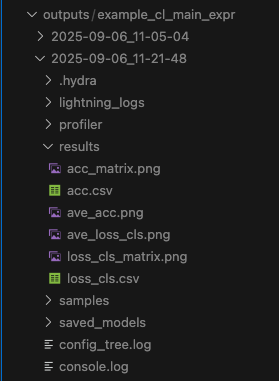
You can monitor experiment progress and check intermediate results at any time during execution. The output directory is updated in real-time as training progresses.
The types of results generated are controlled by configuration settings. For detailed information about, see the Output Results (CL) section.