The tedious setup steps of Python development environment have always been in the way of getting beginners started with Python, and so did I. I have been working on multiple Python projects since I was working on machine learning. I am sharing my experience of setting up the environment to help you avoid pitfalls and save time here, and provide a complete solution step by step which can get your straight to the ready-to-code state.
1 Python Environment Setup
Python environment has been a headache for me for a long time when I was a beginner, and I’m pretty sure you must’ve experienced the confusion a lot as well!
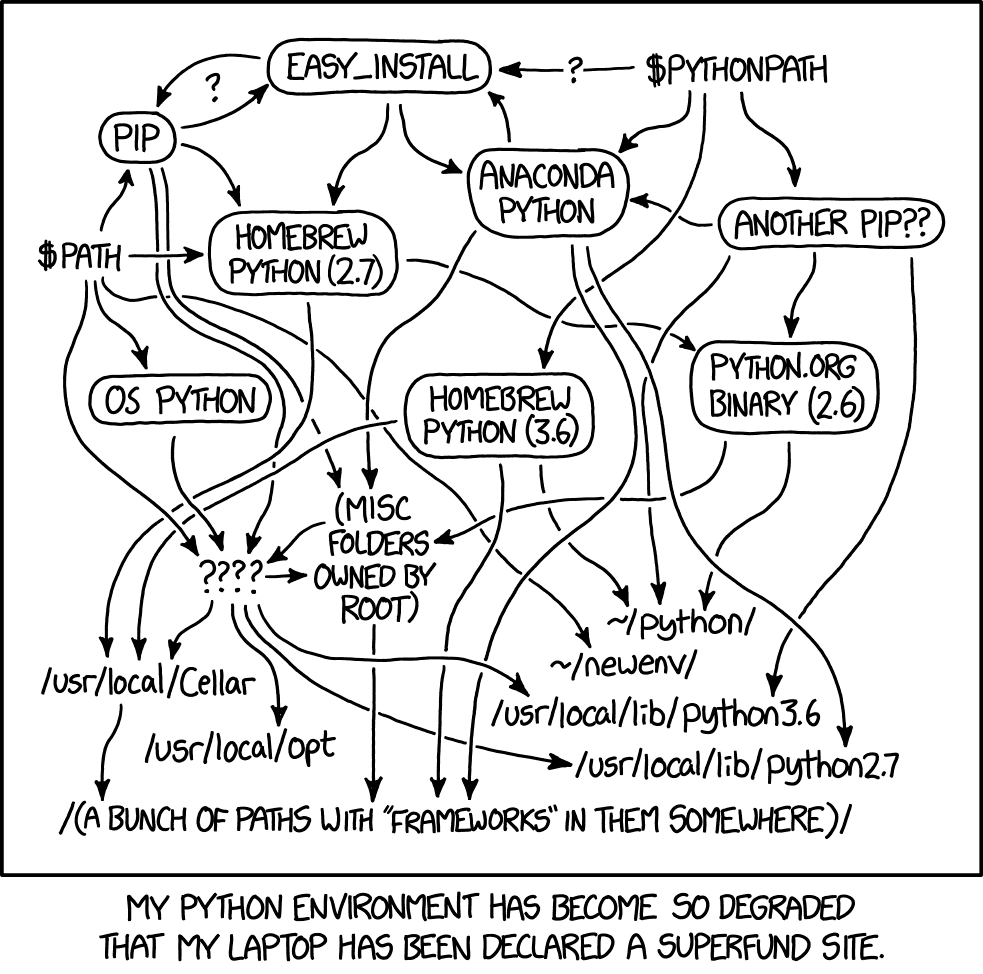
Whenever you start a new thing with Python, there are times you got prompted that Python couldn’t be found whereas you have installed it somewhere, but you just went lazy and followed their hints to install it again, ending up with too many Python versions on your machine like this:
I am using macOS, one thing to note is that macOS always comes with Python pre-installed. You might be surprised when you type python in the terminal of your new Mac and see Python is running. However, it’s not recommended to use that Python environment as it’s outdated and concerned with OS system which we need to be cautious about. We need to leave it alone and install our own Python, and the easiest way I think is to install Anaconda as the Python environment, VSCode as the IDE, and keep everything about Python in this system.
Here are the steps:
- Install Anaconda: Download the installer from the official website. Just like installing any other App on Mac with an installer, keep clicking the “Next” button until it’s done.
- Install VSCode: Download the installer from the official website. Just like installing any other App on Mac, move the app to the Applications folder.
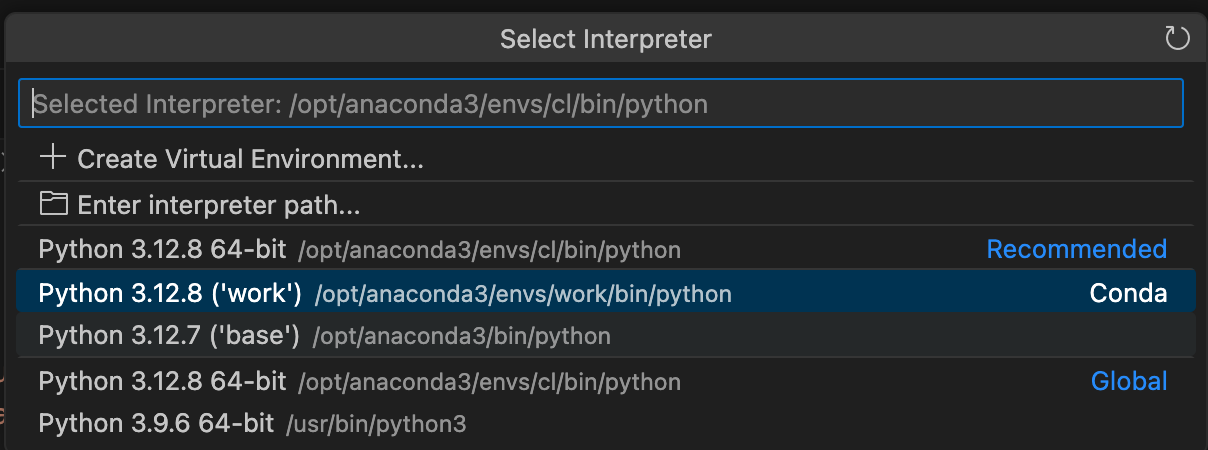
- Open VSCode, install the Python extension, and set the Python interpreter to the Anaconda Python. You can do this by clicking the Python version in the bottom left corner of the VSCode window and selecting the Anaconda Python. In the following screenshot, “Python 3.9.6 64-bit” is not the Anaconda Python. We choose the ones with Conda environment names like ‘base’, which are from Anaconda.
I recommend Anaconda rather than Miniconda. The reason is not that Anaconda has many pre-installed Python packages, some of which are actually not useful for ordinary developers. It is instead that Anaconda has a Navigator thing that shows the presence of this set of Python environment, which let you treat it as a proper App installed on your machine!
And ignore the ads in Anaconda Navigator, like AI feature, other IDEs and Apps, it’s not necessary.
2 Package Management through Conda
The Python packages don’t confuse us as much as the Python versions do, especially when we don’t distinguish different package environments and put all packages in the same environment like the Conda base. But if you are thinking about managing packages in different environments, the Conda thing often causes more confusion.
Some Python tutorials take it for granted that Conda is a must-do thing. However, from my experience, I actually don’t think it’s a bad idea to install all packages in the same environment. People talk about the purpose of keeping environments nice and organised, but why bother doing that? They are just tools serving for developments. In my eyes, environments are just like kitchen drawers, you often see people put all the tools in one utensils drawer, instead of separating them, some for pizza, some for baking, and some for pasta! Gather all the packages in the same environment, and run your projects in this environment, it’s that simple! It truly saves you a lot of energy thinking about managing them, making your package management much like shopping for kitchen tools, you pick up what you fancy and dump them back home in the drawer. And you can easily manage them both in the Anaconda Navigator and the terminal.
However, I don’t recommend doing anything on the base environment. The base environment is hard to be reversed, sometimes you have to reinstall Anaconda. That’s why I created the ‘work’ environment as my main “utensils drawer” (see screenshot above) separated from the base, and put all the packages in it.
The main scenario to use different environments for AI projects is testing across different Python or CUDA versions. Another scenario is when you clone an alien project that requires many packages you’ve never heard at all and would probably never use it after, but AI projects usually use the same old stuff like PyTorch, sklearn, etc. For these kind of scenarios, just create an one-off environment, and delete it after you finish the project.
Another advice is when you are working on your project, keep in mind that your current Conda environment doesn’t represent your project requirements. It’s better to properly list the packages you think it’s necessary in your project, and create a requirements.txt file or something like pyproject.toml to record them. Do not reply on automatically exporting the environment and try to manage the environment itself since you are following my way of “same drawer” practice (unless you are just lazy and don’t care what future developers think), that might create a mess with other packages not related to the project.
3 VSCode Editor Environment
VSCode is currently my favourite editor for Python development. It’s lightweight, versatile, language independent, and has a lot of extensions which make it flexible. And it’s enough to use for someone at my intermediate programming level.
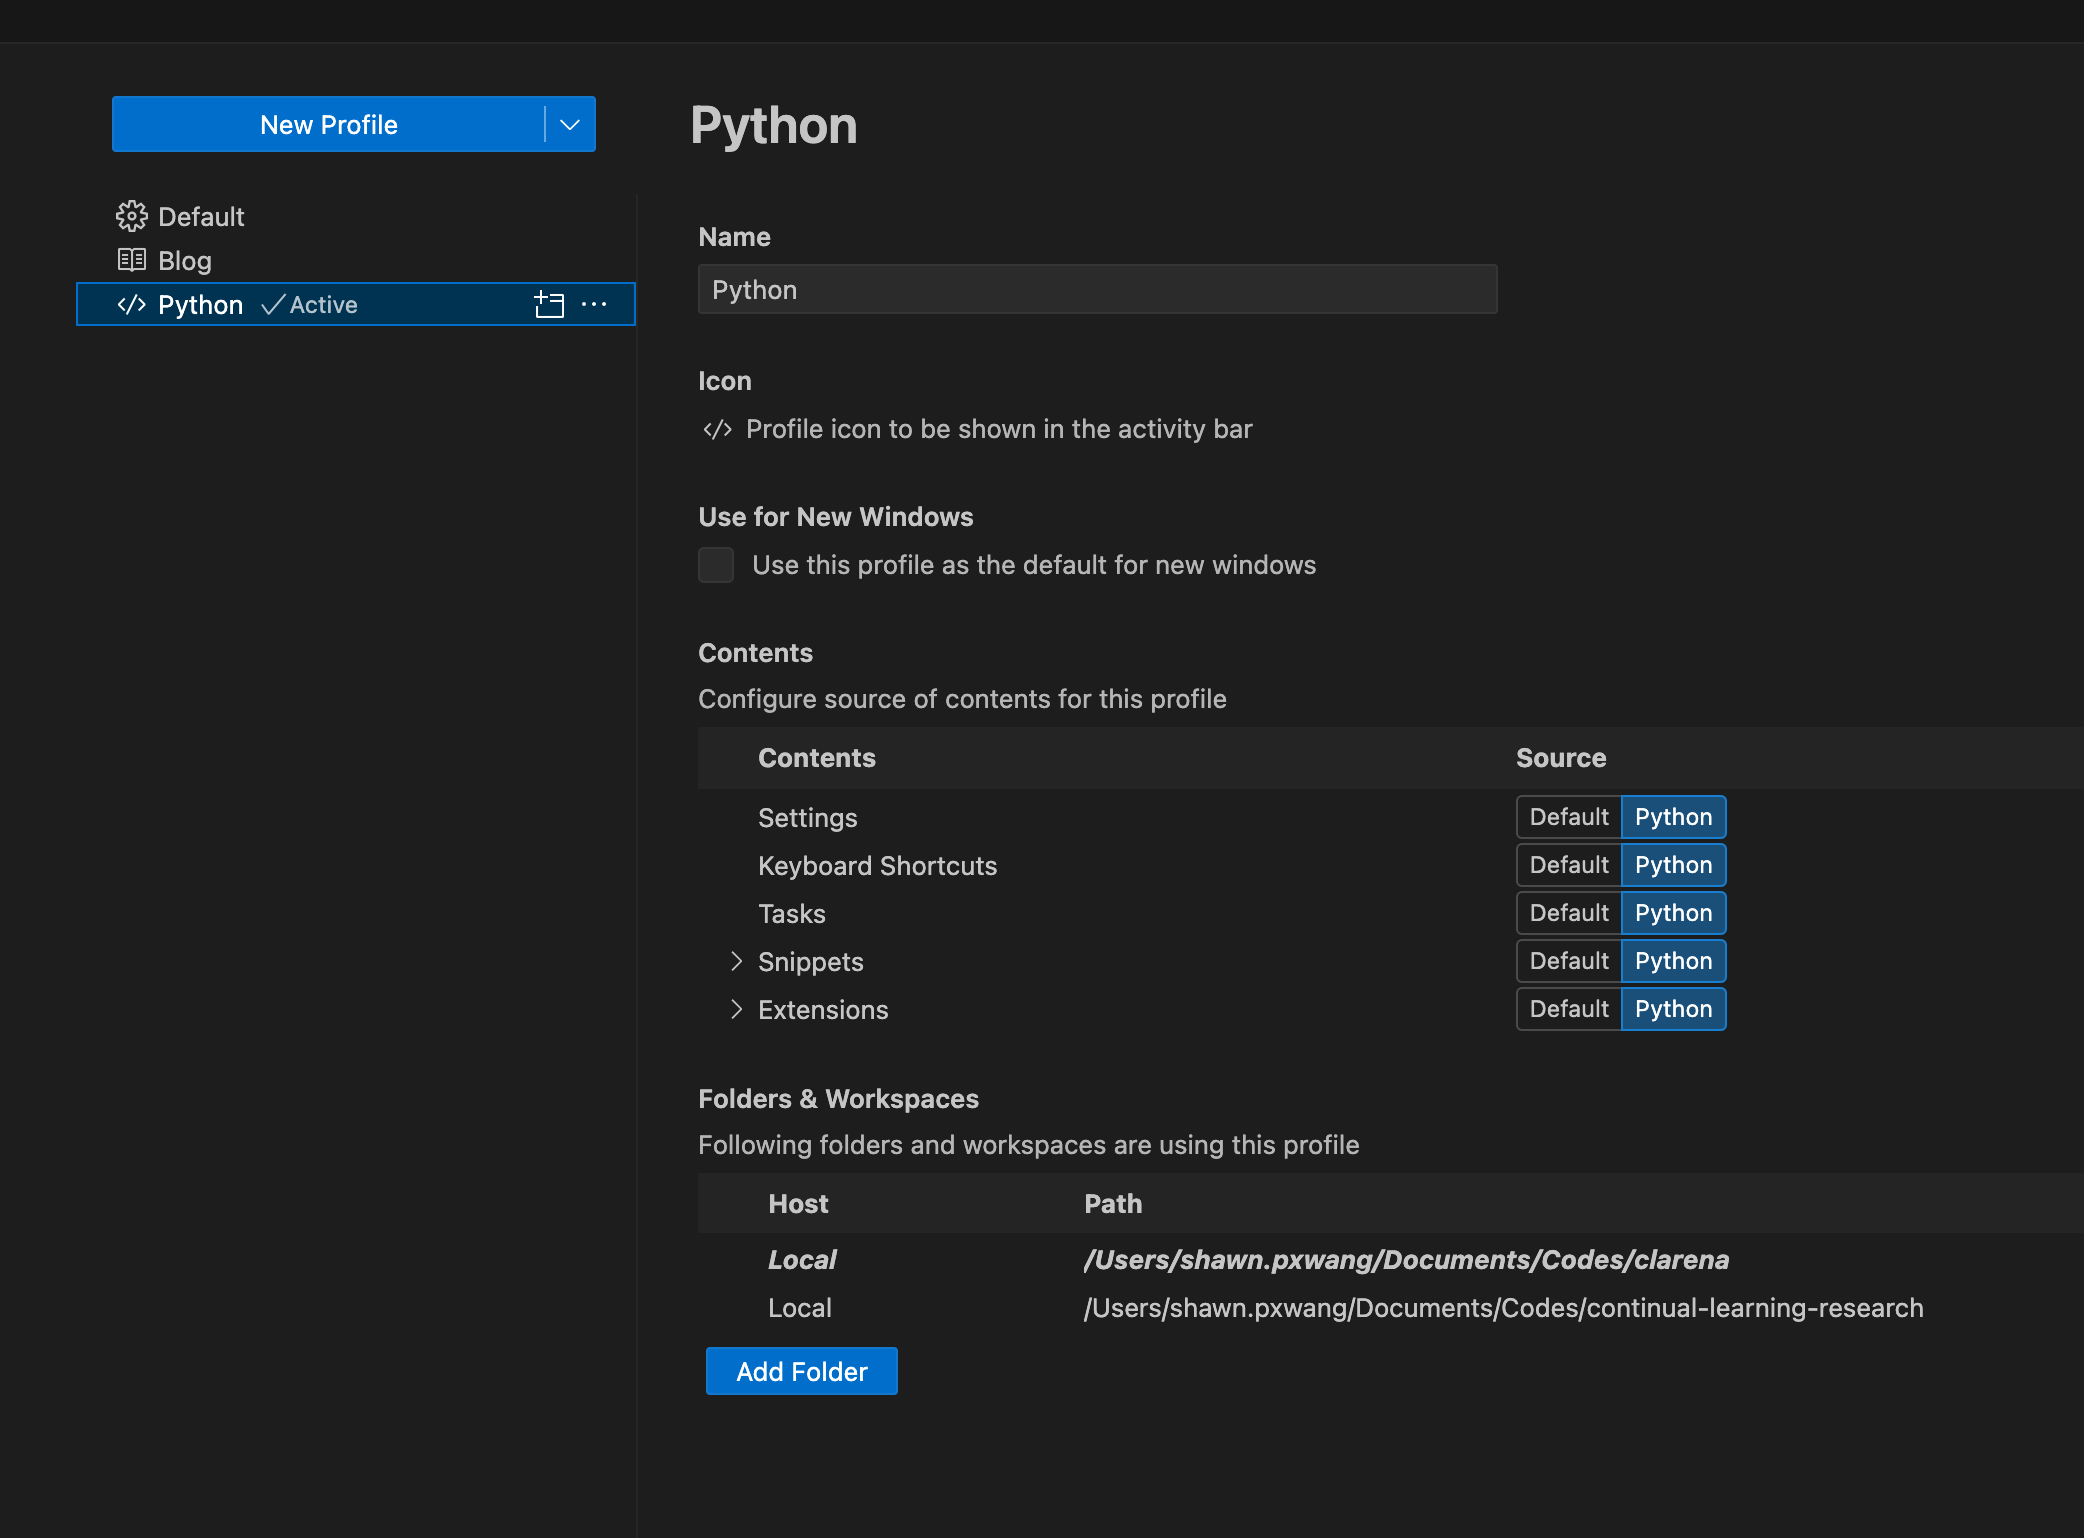
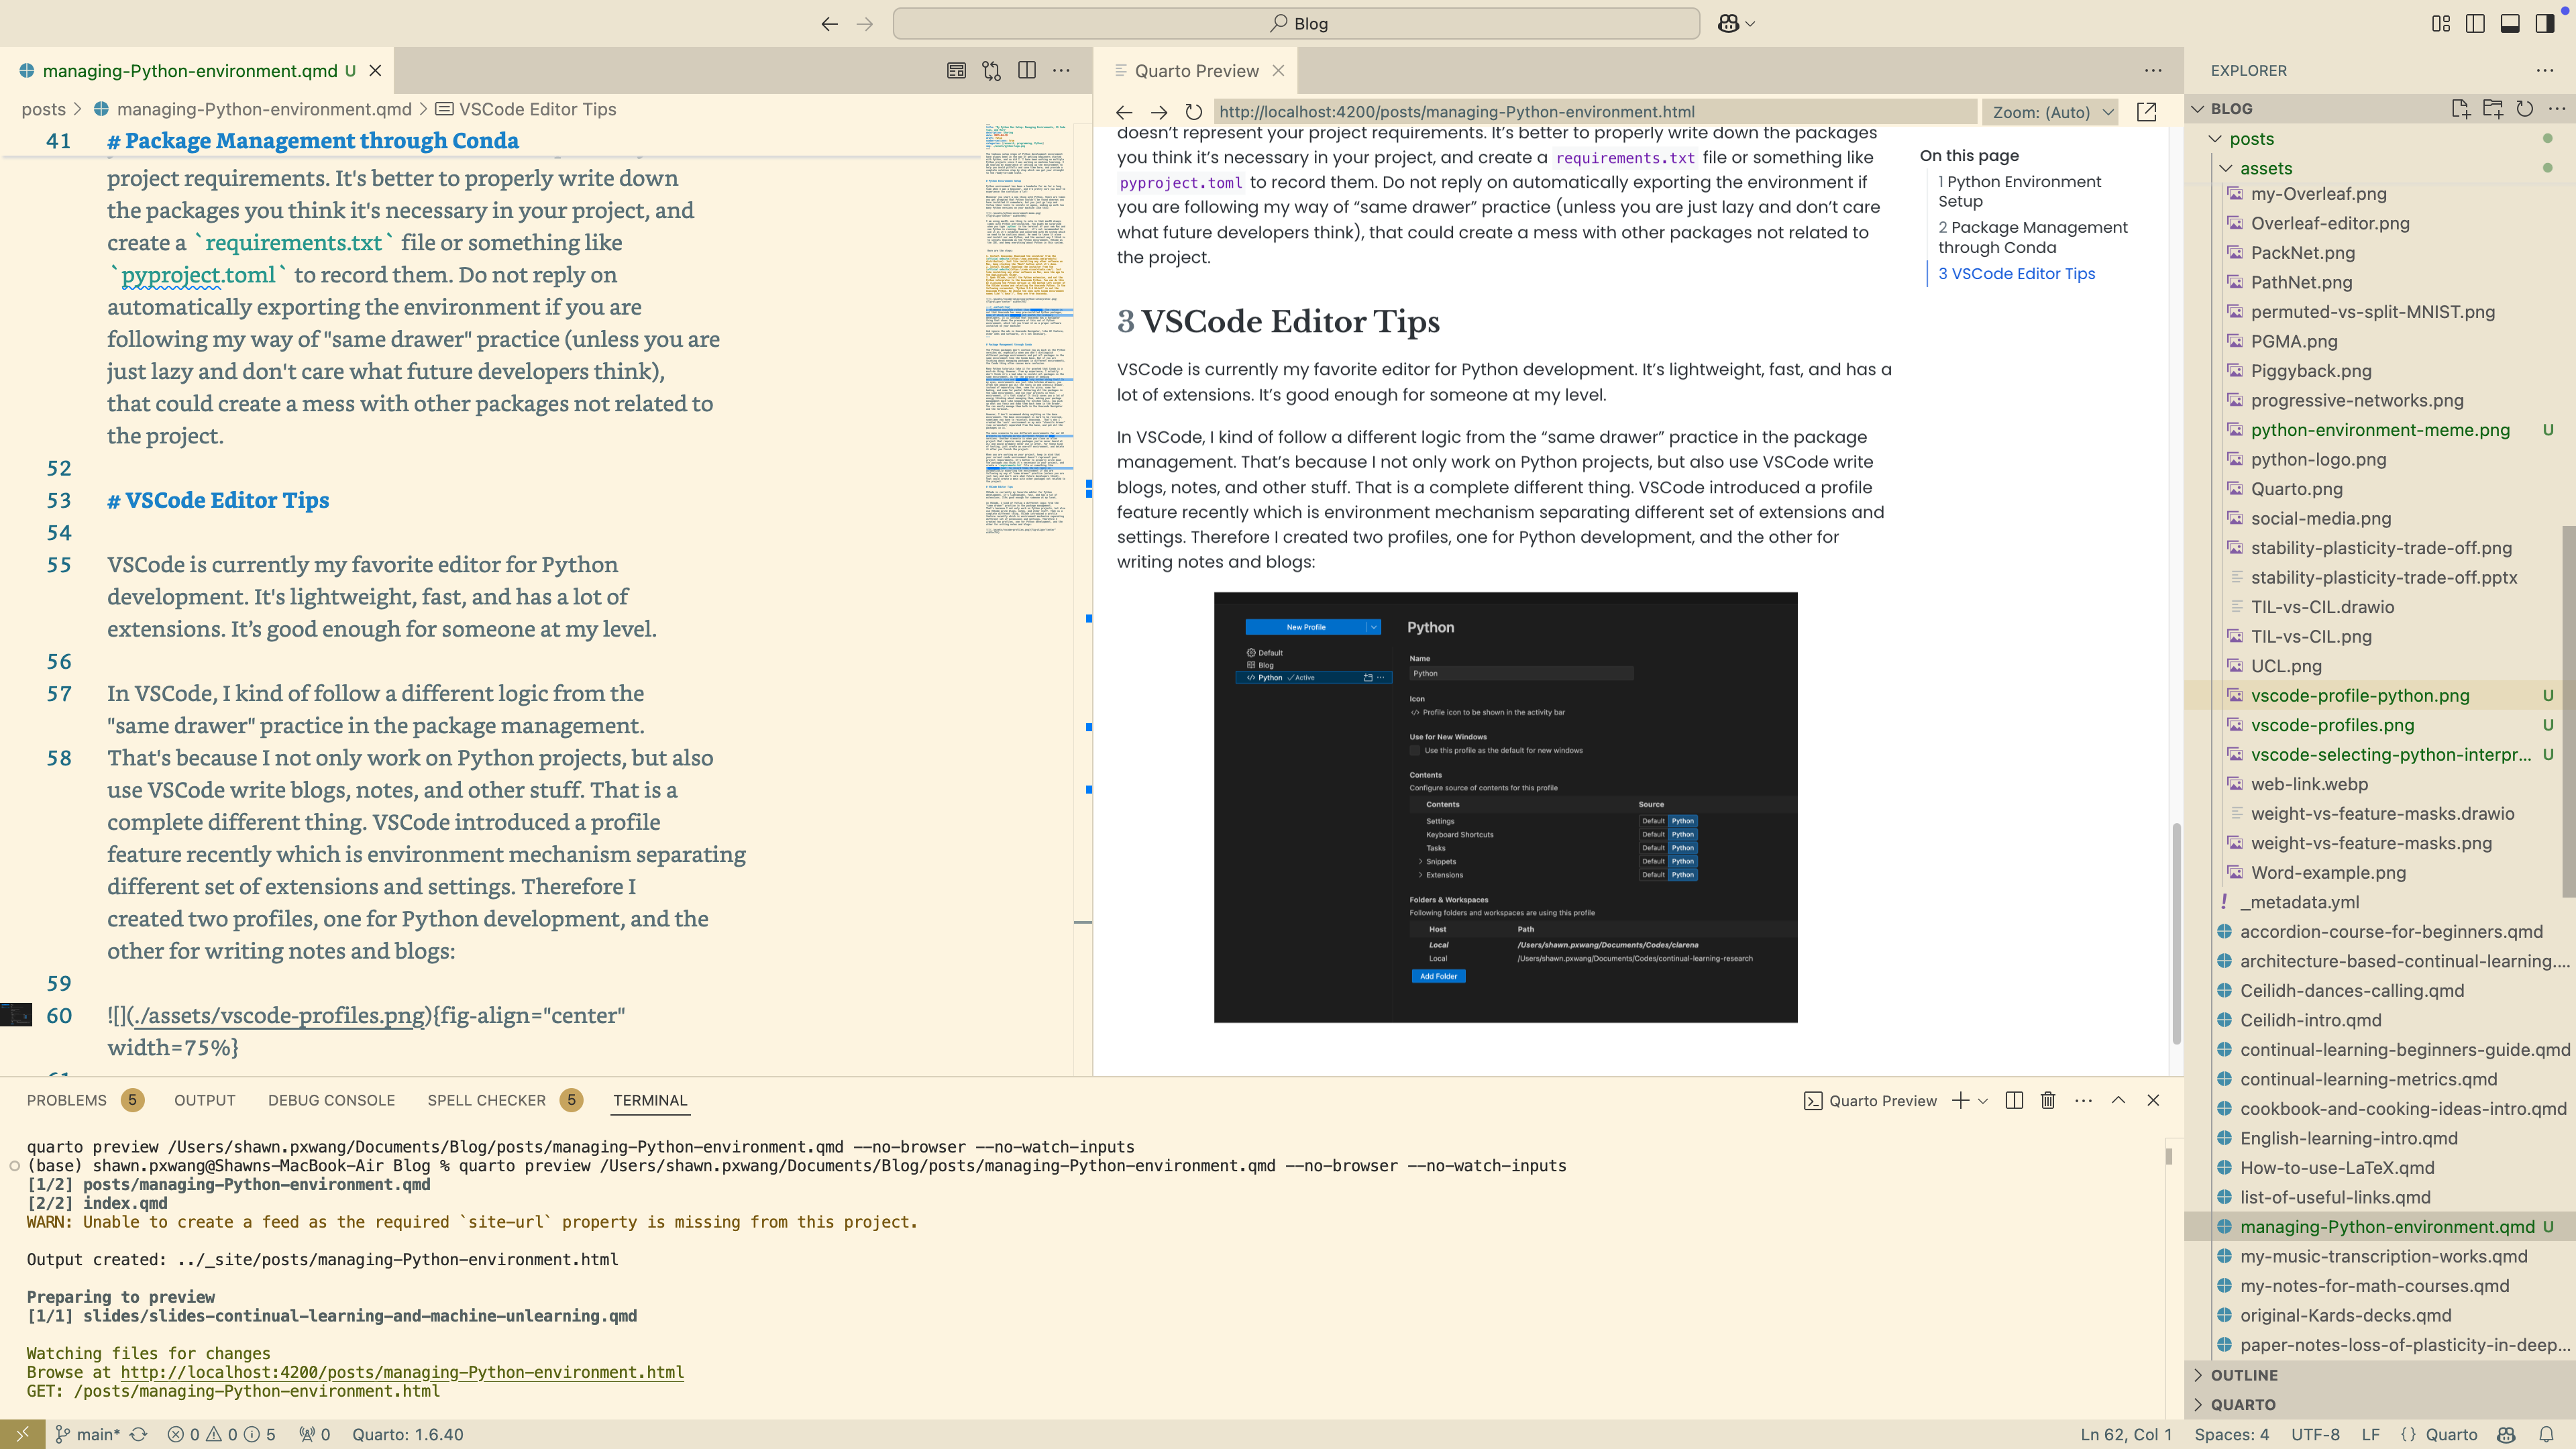
In VSCode, I kind of follow a different logic from the “same drawer” practice in the package management. That’s because I not only work on Python projects, but also use VSCode write blogs, notes, and other stuff. That is a complete different thing, which makes the way you use more like a different App. VSCode introduced a profile feature recently which is environment mechanism separating different set of settings and extensions. I created two profiles here, one ‘Python’ for Python development, and the other one ‘Blog’ for writing notes and blogs (note that I also left the ‘Default’ profile not touched):
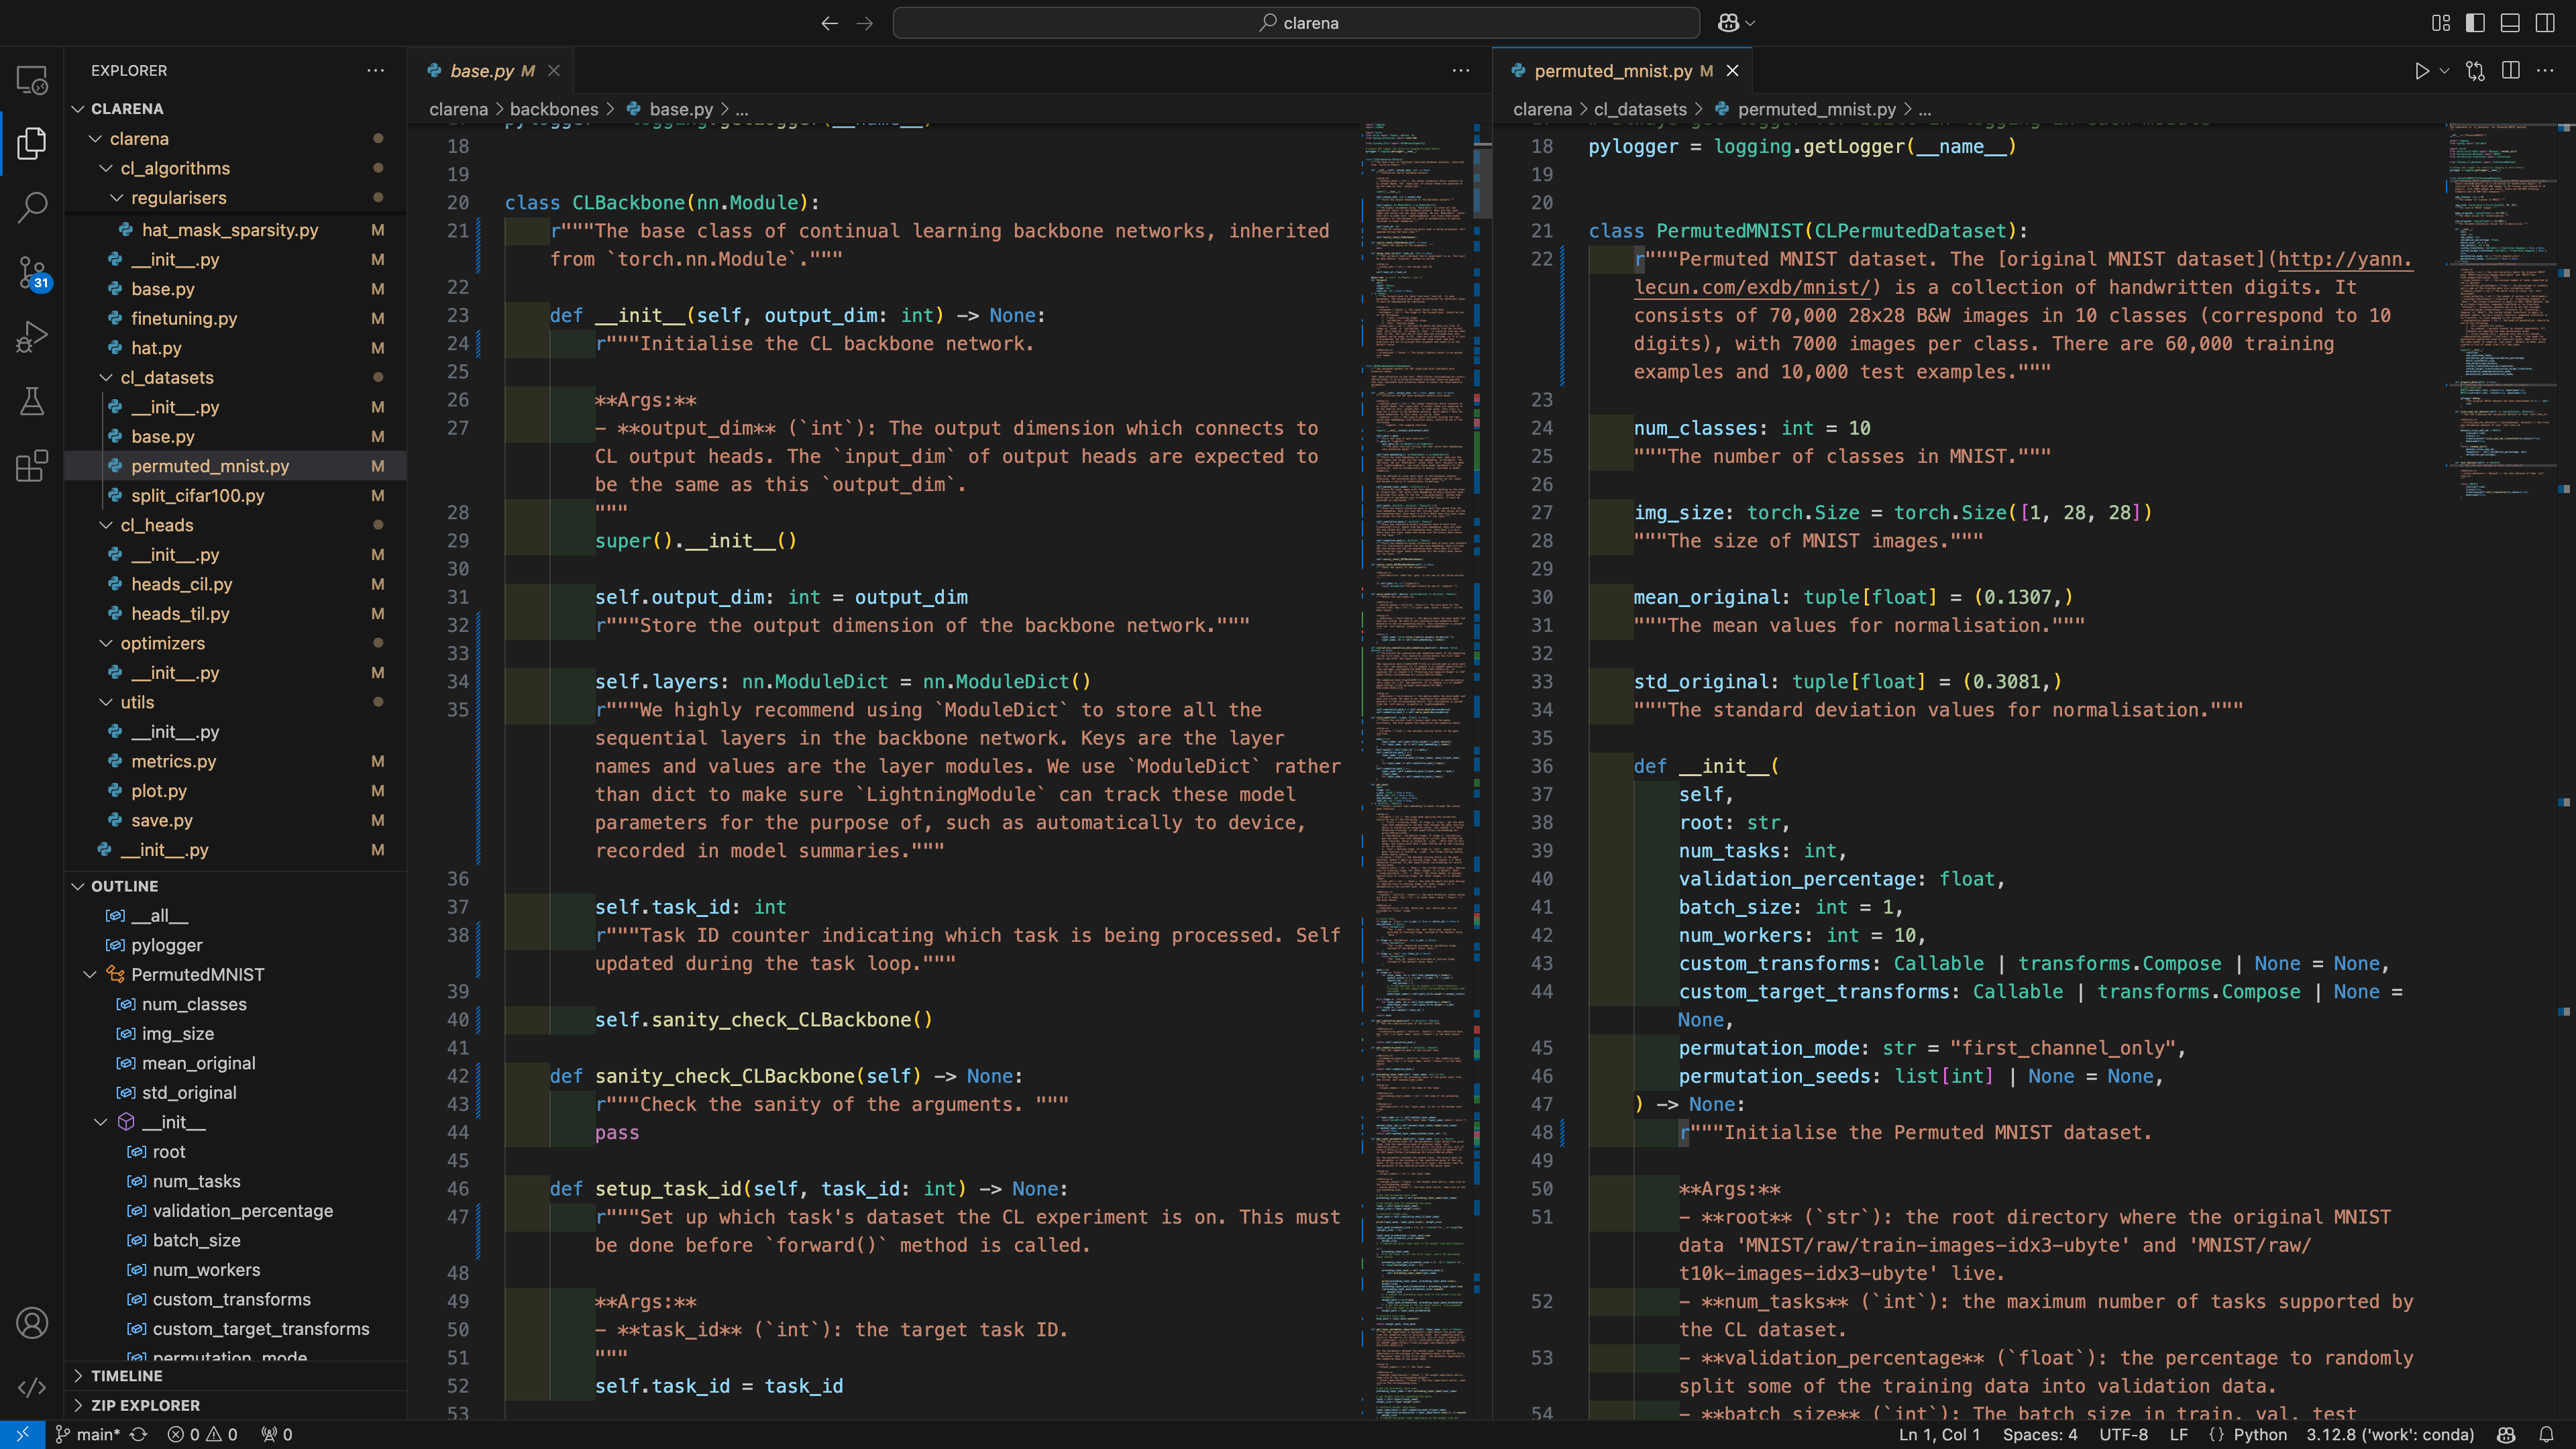
Your working space can be very different by assigning different settings, that even looks like different Apps:
The profiles can be linked to project folders, which means we don’t have create a “workspace” for each project folder. Workspaces in VSCode refer to the project-wise settings that could be stored in .vscode subfolder and automatically activated when the folder is opened by VSCode, and that’s the way we used to do when we wanted to customise settings for different projects.
And also, the profiles can be synced to the cloud, which makes life easier without messing with many different local settings.
Profiles are also associated with sets of VSCode extensions. They are quite similar to the packages which could be dumped in the same set. But I think here it’s better to do it in a more organised way instead, as we need to know well what extensions we are using exactly. VSCode extensions can cause a lot of mess and even conflicts in your editor menus, while Python packages don’t. Extensions are not that, the more the better. I only install the extensions that are essential for my use and make sure I know what they are doing. In the following section, I will list the extensions I use for Python development (AI oriented).
4 My Essential VSCode Settings and Extensions for Python
Here are the settings and extensions I use for Python development in VSCode, which I think are essential. Just pick what you need.
- Formatter: Black and Isort. They are my favourite Python formatter which help adjust the structure, spacing, and style of text. It’s even more convenient if executing formatting on save, making it completely automatic. Install the extensions: “Black Formatter”, “isort”, choose default formatter as “Black Formatter” in settings, and turn on “Format on Save”. Add code actions on save in
settings.json:"editor.codeActionsOnSave": {"source.organizeImports": true, ,}, this will organize imports when saving the file. Added args--skip-glob */__init__.pyskip sorting__init__.pyimports where wrong order can cause circular import error sometimes. I don’t apply"source.unusedImports": trueto remove unused imports since my project intentionally leaves some unused imports for generating documentation in__init__.pyfiles. - Linter: other than the “Python” extension itself, many do the code linting for Python, which help mark out potential problems in the codes. I think “Pylance” is necessary, and others which I’ve also been using at the same time like “Python Indent”, “indent-rainbow” are optional. There is a popular one called “CodeSpell Checker” which checks the spelling in the code, but I don’t recommend it because sometimes we use some special words in the code which are not in the dictionary, and it’s less important to make spelling correct in the code. Most of these linter extensions can be applied immediately after installed.
- Processing external files: since I am working on AI projects, I need to process other formats: “vscode-pdf”, “Draw.io Integration”, “Excel Viewer”, “Rainbow CSV”, “Image Preview”, etc.
- General extensions: AI assistant like “GitHub Copilot”, “IntelliCode”, “ChatGPT” (from official OpenAI), GitHub connectors like “GitHub Actions”, “GitHub Repositories”, remote utilities like “Remote - SSH”, etc.
- Settings: Autosave on Focus change; word wrap bounded; turn off auto reveal.
- Theme: I prefer “dark modern”, font “JetBrains Mono” (need installed), font size 14.